Friday, May 31, 2013

Class07 - CG Integration - render passes, vector motion blur, Nuke comp essential

First we will add some animated stand in geometry, a swinging door that matches the footage so that we can catch reflections on the surface to later use in comp.  Create another mip_matteshadow with generic Lambert Holder shader (because you need the SG only) that catches refl, AO, and shadow for application only to the door stand-in geo.


Rendering out the file in the least possible number of render layers, with all needed render passes.  Render layers take more render time, while passes do not use more time.  As often as possible try two render layers only, fg and bg, then many passes, shadows, indirect, reflection, and 2D motion vectors.


Should we render with 3D or 2D motion blur?
The 3d blur is a true rendering (much slower)  of the object as it moves along the time axis. The 2d blur is a simulation of this effect by taking a still image and streaking it along the 2d on-screen motion vector.


There are three principally different methods:
  • Raytraced 3d motion blur
This is most common, but slowest to render.  For film, with renderfarm, usually do this.
  • Fast rasterizer (aka. "rapid scanline") 3d motion blur
Becoming less common especially now with Unified Sampling render solutions.
  • Post processing 2d motion blur
We will try this method because it does render fastest, sometimes it will not make a difference


There are 4 different ways to get out your motion vectors out, for use in a 2D package.
1) Create Render Pass -> 2D motion vector, 3D motion vector, normalized 2D motion vector
they have other names as associated passes -> mv2DToxik, mv3D, mv2DNormRemap
This is my preferred and more recent method, because it works and is easy.


2) ReelSmart Motion Blur - RSMB, mental ray shader to output 2D motion vectors
Before Maya 2009 released native 2D motion vectors, this was common at work.
You need the free plugin for Maya, and a paid plugin for whatever composite package.


3) mip_motion_vector shader, the purpose of which is to export motion in pixel space (mental ray's standard motion vector format is in world space) encoded as a color, blur in the comp.
Most third party tools expect the motion vector encoded as colors where red is the X axis and green is the Y axis, and in some cases, not this MR, leaving blue as the magnitude of the blur.


4) mip_motionblur shader, for performing 2.5D motion blur as a post process.


Good description of the ReelSmart motion blur shader compared to Mental Ray 2D vectors.


Example case of keeping your bty and your 2D motion vector in sync, then smearing in Nuke


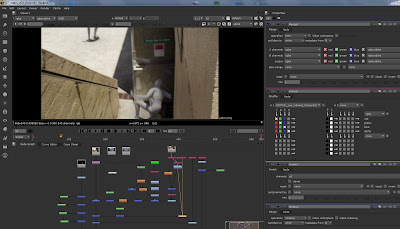
Nuke compositing the separate render passes.  
Now we combine our original plate, (not the one rendered from Maya), with its related shadow, refl, and indirect passes.  Then we can merge the animated character on top.

shuffle, roto, color correct, white balance, vectorBlur


Thursday, May 23, 2013

Class06 - CG Integration of characters into tracked graded footage - exterior example


open tracked camera, use imageplane to view the bg footage.
Scale the entire world, including camera, group everything, then scale.
import in a walking, fighting, running character, from Visor -> motion cap
Set up LCW with an IBL of the panoramic area, also add a directional light for sun.
Replace imageplane with Rayswitch, mip_cameramap, and sphereical_lookup

camera information -
Red Epic, shot steadicam, with 35mm Canon ef lens, 4k-HD, 3840x2160, Camera height is about 165-170cm, tracked with syntheyes.
Assume Mysterium-X with crop factor of 1.73
35mm equivalent focal length is 34.6, so they shot at 20mm
Sensor scale at shooting in 4k-HD is 20.74 x 11.66mm, which is .816 x .459 inche Maya Camera Aperture.


The bg plate sequence is a QT movie called F005_C057_1218NG_graded.mov
Import this into Nuke, and write out as a sequence of jpeg frames.
When you need to bring in a sequence of frames to the mip_cameramap, you will need a naming convention with 4 padded numbers, try jpeg for speed, you care less about quality.
filename_v01.####.jpg
The standard Mental Ray file in node mentalrayTexture will not have a sequence button so you need to replace with the Maya version called file, because that can bring in and animate a sequence.  BUT - the default connection of file.message ---> mip_cameramap.map will work fine interactively, while failing to animate in batch render.

You must disconnect and do a reconnect other from file.outcolor ---> mip_cameramap.map, this will work inside Maya and during batch render.

When you connect mip_matteshadow to some generic Lambert SG holder, be sure to connect all three color, shadow, and photons.
The ambient parameter sets a "base light level". It raises the lowest "in shadow" level. For example, if this is 0.2 0.2 0.2 the darkest shadow produced will be an 20 percent blend of background to a 80 percent blend of shadow (unless ambient occlusion is enabled).

For flipping frames that are rendered exr try the free utility called djv_view from DJV imaging

Subsurface Scatter in Maya 2013, there are a number of new shaders, most notable the shader2, skin2, and mia shaders.  Their main advantage is a per-color scattering ability which allows for the red channel to scatter more then blue and green, making for more realistic skin renders.  Also the ability to use mia_material for diffuse, reflections, highlights etc.
misss_fast_shader2_x is the sss we use in this example, hook it up to lightmap the same way the misss_fast_shader_x is connected.


Class05 - New Maya Render Settings UI to expose Unified Sampling and Environment Light, HDR sunrise sequence


First things first, I installed the MR rendersettings v0.3 for Maya 2013 scripts
go download the mr-rendersettings v0.3, Maya 2013 zip file
place the mel files into your users scripts directory and restart Maya C:\Users\JackMack\Documents\maya\2013-x64\scripts
NOTE: this will not work in Maya 2013.5


A public rewrite of the user interface for mental ray's render settings in Maya. The emphasis of this project are simplicity and modern workflow.  This project incorporates the latest mental ray settings into the Maya UI. The UI files are written in mel.


If you want access to the hidden mental ray 3.10 features without using these scripts, expose here using the string options.
select miDefaultOptions;
I prefer just using this set of scripts to reveal the MR features and reportedly Maya 2014 put most of these menues into the new Maya in almost the same way.

Great info from elementalray blog on Unified Sampling
For the layman, unified sampling is a new sampling pattern for mental ray which is much smarter than the older Anti-Aliasing (AA) sampling grid.  Unified is smarter because it will only take samples when and where it needs to.  This means less wasted sampling (especially with things like motion blur), faster render times, and an improved ability resolve fine details.

Technically speaking, unified is Quasi-Monte Carlo (QMC) sampling across both image space and time.  Sampling is stratified based on QMC patterns and internal error estimations (not just color contrast) that are calculated between both individual samples and pixels as a whole.  This allows unified to find and adaptively sample detail on a scale smaller than a pixel.

“samples quality”
  • This is the slider to control image quality.  Increasing quality makes things look better but take longer.  Do testing at 0.2 or so, then final render at 1.0
  • It does this by adaptively increasing the sampling in regions of greater error (as determined by the internal error estimations mentioned before).
  • You can think of quality as a samples per error setting.


list of current and new features of mental ray verions, currently using 3.10.1.4

Environment Light


You can use the regular Maya procedure for adding an HDRI or a Texture to light the scene including the flags. You can also attach any environment to the camera such as an environment shader, environment switch or Sun & Sky.

1) you can increase the verbosity of the output in the Maya Rendering Menu > Render > Render Current Frame (options box)
2) Time Diagnostic Buffer - check on the “Diagnostic” box in the Render Settings.
and EXR file will write out to \projects\project_name\renderData\mentalray\diagnostic.exr

To get an animated sequence of HDR images into your IBL node (mapping angular), switch type from file to texture, then input a standard Maya texture that can import a sequence.


Class04 - Lighting with area lights, mia look dev, rendering mip-matteshadow in AOV passes and comp with Nuke


Class04 will continue with some look development on the chair, finesse the lights, and break the render into passes with writeToColorBuffer so we can slap comp in Nuke.  Hopefully a little over half the class on this just to get a better looking images, then on to moving footage.


1) Begin lookdev with gray walls, and placement of the three MR area lights, good shadows.
2) Then do some shader work, tune the color, refl glossiness, and bump.
3) Improve the mesh of the chair with disp map approximation editor and cutout opacity.
4) Break the render into AOV passes using writeToColorBuffer and two render layers.
render layer chair
beauty, diffuse, indirect, reflection, shadow
render layer floor
custom_result, refl, indirect, shadow
5) Command line rendering in a shell.
render -mr:v 5 -s 1 -e 1 -b 1 -cam cam_0734 -x 3008 -y 2000 -mr:at fxphd_class04_hallway_v13_passes.mb
6) Bring the two images into Nuke, shuffle out all used passes, then merge together with CC.

mip_matteshadow based on “Differential Shading”
- result - the compound result.
shadows raw - the raw full-color shadow pass on white background, suitable for
compositing on top of a background in \multiply" mode.
- ao_raw - the raw ambient occlusion.
- indirect_raw - the indirect light arriving
- refl_raw - the raw reflections
- illumination_raw - light gathered from any lights in the illuminators list.

writeToColorBuffer pulldown chooses the CustomPass you make in passes

in the mip_cameramap OFF default Transparent Alpha
in Render Globals -> Options -> Custom Entites -> Pass Custom Alpha Channel, need ON
black with zero alpha is mib_color_alpha, this plugs into EYE of mip_rayswitch when you render.

Beauty = diffuse_result + indirect_result + spec_result +
               refl_result + refr_result + tran_result +
               add_result


Class03 - Camera Projection - filmback - interior lighting with HDR image


Building a virtual set, 3D camera matching, and MR productions shaders


For this class we will use an interior HDR panoramic I shot with some background plates, others are avail free on the web.


Summary: 1)building a simple virtual set 2)camera match your 3D camera to a plate 3)using MR production shaders, lookup_sphereical, mip_cameramap, and rayswitch_environment, create and position your IBL network. 4)add lights in the scene to match real world lights.  
5) break out into render layers for composite in Nuke.

DEMO: begin by building the hallways and wall in exact physical scale, then bring in plate image, then do the 3D camera match using filmback and focal length for Nikon D40 (.933 x .614) sensor scale of 1.519.  Make your render res match the plate, then hit fit to resolution, check with a render.

- Maya needs Camera Aperture values in inches.
- Read the exif data of your bg plate using Adobe Bridge or Lightroom.
- Find what camera shot your bg plate, find the film back values, or image sensor size which will be listed in mm, put this into your maya camera.
- If your camera is cheaper and has a cropped sensor, APS-C, then multiply the true focal length by 1.52 and put that into your maya focal length.
- Maya focal length wants the “35mm film equivalent” focal length.


Very good description of camera sensor size with the math behind calculating filmback.
http://earlyworm.org/2012/filmbacks-and-sensor-sizes-for-matchmoving/

Replace imageplane with mip_cameramap -> rayswitch_env -> camera
Replace IBL with mib_lookup_sphereical -> rayswitch_env -> camera
Rotate position of the ibl with IPR until -8.65 hallway in correct position
Create shader for ground mip_cameramap -> mip_matteshadow

Unfortunately mib_lookup_sphereical is difficult to interactively place as there is only radians rotate to position your HDR pano.  I will use sIBL to hack a solution to the rotation I want, or you can mel script this.
explain how rotation works differently (radians) for mib_lookup_sphereical then maya IBL
degrees = radians * (180/pi)
pi = 3.141
rad = degrees/(180/3.141)
Example
deg_to_rad(90)Returns 1.571, which is the same as pi/2.
Here is the sIBL solution
sIBL_lighting_mib_lookup_spherical.rotate = deg_to_rad(sIBL_feedback.rotateY/2);

First you use a normal IBL in maya to rotate your HDR pano correctly.
for example we have rotY=67
to match that exactly with your two spherical lookup nodes
spherical.rot = (67/2) / 57.29578 = .5847
remember that this magic number 57.29578 is 180/pi

hi,
the mapping used by mib_lookup_spherical can be found in the baseenviron.c code which is available from mental images ftp site.
The mib_texture_remap node is simply a transformation matrix so you can use it to flip, rotate, etc the environment shader. By simply scaling it in the x axis by -1, it matches IBL node of maya. Then you can simply apply rotation using again the remap matrix.
note that the you also need mib_texture_vector which goes in the input of the mib_rexture_remap
the output of mib_texure_remap is then plugged into the dir parameter of mib_sherical_lookup
hope it helps...
patrick

When you need to blur some random HDR you download from the web, use Diffuse_SH (spherical harmonics) Panoramic blur, that correctly wraps around the edges and compensates for distortion on nadir and zenith. This mimics the result of a diffuse convolution function, but it runs much faster because it technically is just a special implementation of a multiple box blur.

CONCLUDE: 1)when shooting plates, take as many site specific measurements as possible 2)carefully build a simple real world set, and place camera accurately 3)place lights to match the strongest lights in your HDR image


Class02 - HDRI environments - sIBL


This class will break into three examples of lighting with HDR images, or Image Based Lighting (IBL).
-        Physical Sun and Sky
-        HDR panoramic image with sIBL software
-        Simple env setup for HDR panoramic with mib_lookup_sphereical
Begin with a physical sun sky example to show how Maya can create an HDR environment for you, and use it as a background.  Vue, Bryce, and other 3D packages can be used to make HDR environments for lighting, but in the end photo reference for this stuff is the best, more detail.
Linear Color Workflow with textures and Physical Sky
Summary: 1)how to use and fix gamma of Physical sky 2)how to verify that our textures are color managed
CONCLUDE: 1)always watch for lens shader on the camera when using scripts and tools, be aware of color profile of all incoming textures and colors. 2)mia_x shaders are better because of energy conservation, and no specular component, all spec is refl.
HDR Panoramic images, show the collection of sIBL’s at HDR labs.
IBL or Image Based Lighting
Summary: 1)using HDR images from the web 2)combine direct and indirect lighting by mixing dir lights and FG from the blurred HDR image 3)get rid of noise from HDR images
CONCLUDE: 1)always verify light intensity, and mapping of HDR you get from other sources 2)you can always mix and match the HDR image lights with direct lighting 3)important to split the light into diffuse and specular components, for speed increase and get rid of noise in FG.


sIBL demo with Pegasus statue in the desert HDR image.
Summary: 1)show the sIBL gui software 2)make sure to correctly use Maya Color Management with 3rd party software like sIBL 3)describe sIBL creator, and how these tools are a time saver.
DEMO: show the sIBL interface, explain how it splits light into diffuse and specular components, and some direct sun lights for shadows.  Open Maya, 1st desert sIBL, then Pegasus head, render bad colorspace, fix all colorspace, graph shader network and explain, open results in Nuke to verify, show buddha animation, describe how VFX industry often uses this idea of “split the light“.
CONCLUDE: 1)sIBL is a short cut tool that you can use, but not necessary 2)it is a great way to experiment with many free quality IBL environments quickly 3)important to understand Color Management in Maya when introducing new tools.
Create a simple version of the same environment network we had when using the 3rd party sIBL software.  This network we create does exactly the same lighting, but may not be as easy to tumble around and interact with, but it allows us to do everything in Maya with no additional plug-ins.
mip_rayswitch,
mib_lookup_spherical,
mip_matteshadow - this shader gets applied to all “stand in” objects
mia_physicalsun - this is an optional modify to your sun directional light
You have three textures coming in from an sIBL set (1) RT 3k hdr, (2) FG  small blur hdr, and (3) BG 8k jpeg.  Each of these image files goes into a default matching mib_lookup_sphereical node.  This node does the rotation positioning, with some acute disadvantages, mainly that you cannot see it in the Maya window.

(1) Refl 3k hdr -> into rayswitch env, refl
(2) FG blur hdr -> into only final gather
(3) BG 8k jpeg -> into rayswitch trans, refract, and eye
Then the rayswitch goes into the Mental Ray tab of the camera you render from.  For the ground plane you apply a lambert that has a mip_matteshadow in the shading engine.  This matteshadow gets output of the rayswitch into its main color, this makes the ground have same color as camera will give to it.

The Mental Ray production shaders are hidden by default.  mip_* mib_* mia_*
Simply go to your script editor, type in:
optionVar -iv "MIP_SHD_EXPOSE" 1
Also check out info on the finest in Mental Ray websites from Zap
http://mentalraytips.blogspot.com.br/2007/10/production-shaders-hidden-treasures-of.html
also
type in createNode mip_whatever to create them individually every scene, this sucks, but works
createNode mip_matteshadow;

To find more info you can always search "Mental Ray production shaders" as well as read the 2013 Mental Ray production manual online.
http://docs.autodesk.com/MENTALRAY/2013/ENU/mental-ray-help/


Class01 - Physically Correct Lighting, Linear Color Workflow, and HDR images


Rules to follow when working in Physically Correct Lighting
Always begin with these rules, even when test lighting on a sphere, then later you can break some guidelines as you get closer to final render.

1) Proper real world scale - leave the Maya default unit at cm, make your grid equal meters.
2) All lights must have quadratic decay rate, light intensities can get very high.
3) Be sure we are rendering to a 32 or 16 bit floating point format such as HDR or EXR.
4) Verify that our render window is set to display 32 bit float, and Image display is Linear sRGB.
5) Must use gamma corrected (gamma = 0.4545) textures or Color Management = ON in Maya.

additional suggestions that help give photorealistic resulting renders

6) Use accurately scaled area lights, make them mental ray ON, always raytrace shadows.
7) Use the mia_materials because they have BRDF and physically accurate shading.

Physically Correct Lighting
Summary: 1)computer monitors and images have gamma correction natively, 2)we must adjust our software (maya render view window) to compensate for this, 3) ignoring these details will result in non-accurate lighting falloff and highlights.


Our graphics programs like Maya, Mental Ray, and Nuke all use Linear math, but our display hardware uses non-linear (logrithmic math), or gamma correction, commonly 2.2 also known as sRGB.  Therefore our images from all digital cameras, photoshop, and internet jpegs are all gamma corrected, meaning they have an inverse 1/2.2 (or 0.4545) correction curve baked into the image file, so they look nice on our monitor.  The problem happens when we feed these gamma corrected images into Maya as textures, and they are not linear.  We can adjust the gamma of each one in the shader networks, or use the new Maya Color Management tools.  Even without textures, this is important when you are lighting images because evaluating your renders in the wrong colorspace could get you unrealistic light decay, and blown out highlights, whereas you really want to do 3D and compositing work in a Linear colorspace where lighting has a greater falloff and softer highlights.
Demo:  open a new maya, set your grid to be one meter (a baseball bat or parking meter), import in bunch of spheres and area lights, try some test renders to look at falloff, change render to EXR and 32bit float, discuss the quality of light as exposure is changed.  Second open the file with a texture mapped sRGB plane, render that and discuss Color Management.
Lets make sure Maya is also working in this Linear workflow.
-Render Panel -> Display -> 32bit floating point HDR
-Render Options -> Frame Buffer -> RGBA float 4x32bit
Conclude: 1) we must work in real world units meters 2) must use quadratic light falloff 3) must maintain Linear Color workflow 4) must evaluate renders with the render view gamma corrected sRGB, or 2.2 (5) consider using all mia shaders
Summary of the Solution:
1)Everything you put into a 3D render, textures, backgrounds, or in our case HDR images for lighting, make sure they are linear, that means no change to our HDR images, but we need a 0.45 gamma correction on all non-linear textures, procedurals, and plain solid color in shaders.  As of now, Color Swatches are not color managed in Maya.
2)When looking at our test renders in the Render View window, be sure to view them with the Viewer gamma correction of 2.2 or sRGB.  They will look good to our eyes, but that is not what we render.  Rather we render out Linear, floating point, and bring into Nuke, doing whatever comp is needed, all in Linear 32-bit color space, (always working with this temp screen gamma correction ON in Nuke), then render out result and safely bake in a gamma correction for final comp.
Color swatches are not color managed. To maintain a linear workflow, single color swatches in shaders, procedurals, utility nodes and lights should be converted to a linear color. A simple way to approximate this conversion is to attach a Gamma Correct node (Window > Rendering Editors > Hypershade > Maya > Utilities) to any Color attribute of a rendering node, then set the Value attribute of the Gamma node to the desired color and set all three Gamma values (RGB) to 0.455.

Some good descriptions of Linear Color Workflow details.
What is a High Dynamic Range Image (Photoshop and Nuke)
Summary: 1)what makes an image High Dynamic Range, 2)how to create an HDR in photoshop from an exposure wedge, 3)how to verify an image is 32bit float in Nuke, 4)what are some different types and formats of HDR images.
Hdr image has very dark darks, and very bright whites.
It is not the colorful images seen on flickr, those are tonemapped images that started as HDR.  Our HDR images are floating point images rather then integer, which allows storing a nearly unlimited dynamic range in a compact way.  When we get from the internet or create our HDR images we will always verify that they are floating point, and we will strive to get more details in the shadows and highlights.  We will focus on EXR format, the 32bit floating point format created and used by ILM on all of their movies.
Open the two wedge images that I took here in Rio, then open the result in Nuke.  Open the two test images from OpenEXR test images.  They are 16bit float and 32bit float.
Verify they are float because Nuke has input colorspace LUT is default Linear.
Nuke works in a native 32bit per channel linear RGB color workspace
formats hdr and exr, Paul Debevic ICT light probe
where to find free HDR images
Three HDR styles are (1) latitude longitude (lat long) (2)vertical cross or cubic (3)light probe
DEMO: open up some sample HDR images, show linear and sRGB, show light intensity with eye dropper, open a wedge of images in Photoshop, show how we will get details from the lights and darks, do a quick HDR create,
CONCLUDE: we are going to work with EXR, latlong, verified 32bit floating pt HDR images