Friday, June 28, 2013

Class10 - Manual set reconstruction from an HDR panoramic image

It would be great to have more automatic set reconstruction by using, LIDAR, 123D Catch, Photosynth, or other point-cloud based method.  But that is not always possible due to access to the location, time, money, and patience.  Also many times you really only need basic layout of the area, such as floor, wall, and one major light source.  For these cases we can manually rough out a 3D model of the scene in our panoramic image and map the geo with that HDR.

All credit for this scene and lesson to Christian Bloch and The HDRI Handbook 2.0


Make sure you Maya gird is set to meters so we are working in real world scale.
Start with a nurbs sphere, increase spans from 4 -> 8, so we can flatten top and bottom.
We will shape a big disk/cylinder type shape and project our pano inside there.
When flattening the top and bottom, use move tool options, turn off “Retain component spacing”
In your panel go to shading -> interactive shading = off, to prevent wireframe while moving cam.
In the attribute spreadsheet, filp normals in render tab so we can see the inside of the disk.
Apply a surface shader with spherical projection of our panoramic image.
Check for backward text, you may have to horizontal flip the image, in shader Uscale -1.

Here is a great slide presentation in PDF format from Ben Snow at ILM presented at Siggraph 2010 which describes using their software Ethereal for extracting lights from a pano and how they would use basic set reconstruction with HDR textured on for lighting Iron Man 2.


Must place spherical projection center at same height the panorama was shot from, 1.75m.
Next estimate the ceiling height to be 4.7m, and make the thing big, about 40m diameter.

1) bake the spherical projection into a UV map, so we can map with surface shader
When you project and create the new UV maps for geo, make it spherical from exact same point as the original spherical projection is from, so you can switch back and forth.
2) the columns and boxes could be planar projected and adjusted in the UV window.  
The back walls will need to have UV’s normalized to fit, may also have to quad the triangles around the ugly nadir, this stuff could be easier in Modo or other modeling program.
2) separate the projected pano into foreground and background, also two shaders
3) use photoshop or other paint program to fill in or re paint occluded areas
4) select a column you don’t want in bg, delete, fill with content aware fill, photoshop

If you get this error using exr files as textures, just convert them to hdr format with Nuke.
// Warning: Failed to open texture file d:/class_fxphd/project_fxphd01/sourceimages/class10_panorecontruct/subway-lights_aligned.exr //
The EXR format will actually work in the render, but it gives this error anyways.


Once you have the environment geometry textured, you will now be lighting with primarily Final Gather.  To get better shadows you could place an area light at the locations of light in the scene.  Another option to get direct lighting and shadows is to have one render layer that swaps out your geo environment with an IBL same map, then turn on Environment Lighting Mode.  This is slow to render, but would only be used for shadows landing on the ground caught with mip_matteshadow.

Friday, June 21, 2013

Class09 - Texture map 3D set geo with HDR pano - continued

This class will continue the concept started last week with a different background in the light tent.  These things come with 4 different colored pads to get a variety of looks in your photography, so we will work with the blue floor and back wall.  


What are string options?

String Options are essential a tool for you to declare a variable to the mental ray renderer that is not directly built into the Maya/mentalray translator.  You can use string options to tell mental ray to turn on/off a feature and what settings to use.
Once you start using the user_ibl_rect for your area lights, you must add this string.
select miDefaultOptions
hit “add new item”
scroll down to the last new empty string in the attribute editor
name = light relative scale
value = 0.318
type = scalar
Spelling is important, and the value 0.318 is the recipricol of pi.


It has to do with how shaders work with light (and the amount, hence, scale) and that newer shaders handle light differently. By adding this string option you ensure scenes with old, new, or mixed shader types react the same way.
Lastly, and very important: you must use the string option for Light Relative Scale for this shader to correctly scale the light for non-BSDF or older (legacy) shaders. This value is 1/pi. This is added in the miDefaultOptions.
Light scaling. If using traditional materials, rather than bsdfs, etc., use the string option "light relative scale" with a scalar value of 0.318, which is roughly 1/pi
And make sure disable the spec from the mia
b) Rectangle type area light shape. For user_ibl_rect, ensure that the type of area light shape is rectangle.


There are 3 IBL systems in maya 2013.
(1) There is standard IBL that was in maya since decades.
(2) There is Native IBL that work with standard IBL just accelerate it better and importance sample the HDRI, also gives you direct lighting with shadows, can turn off or reduce FG.
(3) There is User_IBL_env that is new with MR 3.10, you connect HDR image to an area light and camera env.
Lastly there is the other IBL shader calle,  User_IBL_rect - which is a lights shader that we can use with HDR textures. So if we plug texture into this shader it will be  used as light source it will use importance sampling to sample it and render quite fast, good with Unified Sampling.


Now we take a closer look at the user_ibl_rect light shader.
When rendering command line, I get this message because I have visibility OFF for my lights.
“IBL shaders should be applied to a VISIBLE user area light to work optimally”


First we will do some simple comparison tests between visibility ON/OFF.
Visibility OFF creates a specular response, this highlight is not good because it doubles the light.
The renderer messages and documentation suggest keeping visibility ON.


Lighting - Create an animatable control switch to handle lighting, texture switch, and two light intensities.  On the light tent geo (1) create attribute, float, between 0 and 1  (2) write an expression on the blend node that will dissolve between the two textures (3) use set driven key to control the two light intensities between 0 and 2


Kit-bashing - Look at the animated spider file.  Do a clean export of only parts you need, no render layers, hidden geo, old shaders, all optimized.  Replace legacy shaders with current mia light conservation shaders with textures plugged in.  Group, import, then scale, rotate and translate into place.


Modelling -  Using polygon extrude, dig out a hole where the spider will emerge.  Be sure to go into UV texture window to un stretch around the mouth of the spider hole.  


Camera animation - make a two node camera so you can keyframe the aim node and attach to motion path for the camera body.


Render - break into as few render layers as possible.  Use PCM pass contribution map to render foreground character with background light tent, then have matte passes with holdout to separate later.  Because the light tent is using a surface shader and not actually being affected by lights, you will need to create diffuse pass for the hole only.  Also will need a shadow pass with mip_matteshadow.

Comp - put layers together in Nuke, compare to basic photographs of the light tent.

Voxelizer Script


I had to try one experiment with voxelizer after seeing some cool examples online.  The idea of breaking any complex model into little discreet parts is always interesting to me, so I took the Infinite Realities head and ran this script on it.  After a two minute wait it pops out 4000+ cubes, will a little bit of spacing between them, and they each have their own Lambert shader with a color resulting from a sample of the texture that was on there.  The only problem was I wanted SSS skin shader on each one, but this script would only put out lambert, and I did not find a way to convert them all.  So I rendered that in the blue light tent and posted here, very little effort, but a fun exercise.  For sure I want to make them look like skin, and I want them to drop to the ground or explode with Rigid Body Dynamics.  Next time.


Tuesday, June 4, 2013

Class08 - Shoot and Stitch HDR pano then texture map 3D set geo

For this class I will experiment with a 30 inch cube light tent and two big lights.  The idea is to shoot an HDR panoramic photo inside the tent, then rebuild the tent geometry in Maya, and do a spherical projection of the HDR in order to verify we are getting true inverse falloff from our HDR lighting image.  In addition I will shoot the tent under different lighting conditions so we can flip textures to turn lights on and off.


This is a great presentation of HDR panos projected on 3D scanned and rebuilt set geometry for the film Beautiful Creatures.


Show the photos and basic workflow for shooting a panoramic using fisheye lens, Nodal Ninja, table tripod, ProMote for exposure brackets, and Nikon D40.  In this example I shoot 6 times around, 2 up zenith, 2 down nadir, and 7 exposure brackets from 1/2500 to 1/2.5 or 2EV’s per step.  We will shoot with a variety of lighting conditions, but identical everything else (basically turning lights on and off), giving us 70 RAW photos per pano.


Very fast description of viewing the photo sets in Adobe Bridge and the Hybrid stitching workflow as described in “The HDRI Handbook 2.0 by Christian Bloch.  Merge each exposure bracket into HDR image and tonemapped jpeg using batch Photomatix.  Then stitch only the 10 jpegs in PTgui for faster software response. Once you have a great stitch, you swap in the 10 HDR images, and PTgui will process them together much faster. This workflow breaks up the work and makes it faster for interactive parts and more automatic for the mindless batch parts. Helps when you have lots of panos.

http://www.hdrlabs.com/news/index.php


In Nuke show how to use the Spherical transform node to paint out the tripod from you pano.  Also some white balance and possible boosting of the gain to increase light values.  To have  later with user_ibl_rect, crop cut out each light and export out as HDR texture.  Light extraction.


In Maya do a comparison of a model rendered with this HDR on a typical spherical IBL and the same pano mapped onto the 3D model of the light tent which should allow us to have accurate inverse falloff of light.


Set up two area lights with user_ibl_rect that will generate direct lighting and shadows, allowing us to depend less on Final Gather.  You may need to add light relative scale = 0.318 (the reciprocal of Pi) in the string options for this feature.


In addition we will try to use direct lighting (we want good shadows) with these HDR textures by using either user_ibl_rect (maya 2013) or builtin_object_light (maya 2014)


If you are using Maya 2013, this is the method we will cover here.
Introduced with mental ray 3.10 are new shaders called the user_ibl shaders.
Inside this shader package are two new shaders with different usage scenarios.
  • user_ibl_env
    • A more simplified usage than the Native IBL (mental ray), the user_ibl is a scene entity used for lighting a scene globally from an environment.
  • user_ibl_rect
    • A shader used to generate light cards or “billboards” to replace otherwise complex geometry and lights in a scene.
Try user_ibl_rect, just attach as light shader to your MR area light, it can illuminate and cast shadows.  Also use the connection editor to connect user_ibl_rect Samples -> areaLight areaHiSamples and areaLoSamples.  Must have “use light shape” ON, and visible.


If you are using Maya 2014, we will not cover this now, perhaps next week when I upgrade.
mental ray 3.11 includes a new shader called the builtin_object_light that tells mental ray that the object is a light.


Animate lights turning on and off by using the blend mode to dissolve through our identical but different light condition HDR textures.


Drop in some animated creature and hope for the best.


Friday, May 31, 2013

Class07 - CG Integration - render passes, vector motion blur, Nuke comp essential

First we will add some animated stand in geometry, a swinging door that matches the footage so that we can catch reflections on the surface to later use in comp.  Create another mip_matteshadow with generic Lambert Holder shader (because you need the SG only) that catches refl, AO, and shadow for application only to the door stand-in geo.


Rendering out the file in the least possible number of render layers, with all needed render passes.  Render layers take more render time, while passes do not use more time.  As often as possible try two render layers only, fg and bg, then many passes, shadows, indirect, reflection, and 2D motion vectors.


Should we render with 3D or 2D motion blur?
The 3d blur is a true rendering (much slower)  of the object as it moves along the time axis. The 2d blur is a simulation of this effect by taking a still image and streaking it along the 2d on-screen motion vector.


There are three principally different methods:
  • Raytraced 3d motion blur
This is most common, but slowest to render.  For film, with renderfarm, usually do this.
  • Fast rasterizer (aka. "rapid scanline") 3d motion blur
Becoming less common especially now with Unified Sampling render solutions.
  • Post processing 2d motion blur
We will try this method because it does render fastest, sometimes it will not make a difference


There are 4 different ways to get out your motion vectors out, for use in a 2D package.
1) Create Render Pass -> 2D motion vector, 3D motion vector, normalized 2D motion vector
they have other names as associated passes -> mv2DToxik, mv3D, mv2DNormRemap
This is my preferred and more recent method, because it works and is easy.


2) ReelSmart Motion Blur - RSMB, mental ray shader to output 2D motion vectors
Before Maya 2009 released native 2D motion vectors, this was common at work.
You need the free plugin for Maya, and a paid plugin for whatever composite package.


3) mip_motion_vector shader, the purpose of which is to export motion in pixel space (mental ray's standard motion vector format is in world space) encoded as a color, blur in the comp.
Most third party tools expect the motion vector encoded as colors where red is the X axis and green is the Y axis, and in some cases, not this MR, leaving blue as the magnitude of the blur.


4) mip_motionblur shader, for performing 2.5D motion blur as a post process.


Good description of the ReelSmart motion blur shader compared to Mental Ray 2D vectors.


Example case of keeping your bty and your 2D motion vector in sync, then smearing in Nuke


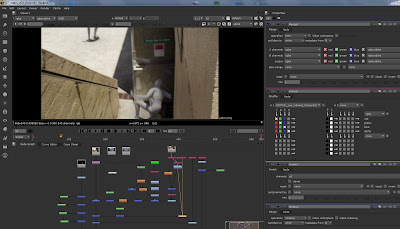
Nuke compositing the separate render passes.  
Now we combine our original plate, (not the one rendered from Maya), with its related shadow, refl, and indirect passes.  Then we can merge the animated character on top.

shuffle, roto, color correct, white balance, vectorBlur


Thursday, May 23, 2013

Class06 - CG Integration of characters into tracked graded footage - exterior example


open tracked camera, use imageplane to view the bg footage.
Scale the entire world, including camera, group everything, then scale.
import in a walking, fighting, running character, from Visor -> motion cap
Set up LCW with an IBL of the panoramic area, also add a directional light for sun.
Replace imageplane with Rayswitch, mip_cameramap, and sphereical_lookup

camera information -
Red Epic, shot steadicam, with 35mm Canon ef lens, 4k-HD, 3840x2160, Camera height is about 165-170cm, tracked with syntheyes.
Assume Mysterium-X with crop factor of 1.73
35mm equivalent focal length is 34.6, so they shot at 20mm
Sensor scale at shooting in 4k-HD is 20.74 x 11.66mm, which is .816 x .459 inche Maya Camera Aperture.


The bg plate sequence is a QT movie called F005_C057_1218NG_graded.mov
Import this into Nuke, and write out as a sequence of jpeg frames.
When you need to bring in a sequence of frames to the mip_cameramap, you will need a naming convention with 4 padded numbers, try jpeg for speed, you care less about quality.
filename_v01.####.jpg
The standard Mental Ray file in node mentalrayTexture will not have a sequence button so you need to replace with the Maya version called file, because that can bring in and animate a sequence.  BUT - the default connection of file.message ---> mip_cameramap.map will work fine interactively, while failing to animate in batch render.

You must disconnect and do a reconnect other from file.outcolor ---> mip_cameramap.map, this will work inside Maya and during batch render.

When you connect mip_matteshadow to some generic Lambert SG holder, be sure to connect all three color, shadow, and photons.
The ambient parameter sets a "base light level". It raises the lowest "in shadow" level. For example, if this is 0.2 0.2 0.2 the darkest shadow produced will be an 20 percent blend of background to a 80 percent blend of shadow (unless ambient occlusion is enabled).

For flipping frames that are rendered exr try the free utility called djv_view from DJV imaging

Subsurface Scatter in Maya 2013, there are a number of new shaders, most notable the shader2, skin2, and mia shaders.  Their main advantage is a per-color scattering ability which allows for the red channel to scatter more then blue and green, making for more realistic skin renders.  Also the ability to use mia_material for diffuse, reflections, highlights etc.
misss_fast_shader2_x is the sss we use in this example, hook it up to lightmap the same way the misss_fast_shader_x is connected.


Class05 - New Maya Render Settings UI to expose Unified Sampling and Environment Light, HDR sunrise sequence


First things first, I installed the MR rendersettings v0.3 for Maya 2013 scripts
go download the mr-rendersettings v0.3, Maya 2013 zip file
place the mel files into your users scripts directory and restart Maya C:\Users\JackMack\Documents\maya\2013-x64\scripts
NOTE: this will not work in Maya 2013.5


A public rewrite of the user interface for mental ray's render settings in Maya. The emphasis of this project are simplicity and modern workflow.  This project incorporates the latest mental ray settings into the Maya UI. The UI files are written in mel.


If you want access to the hidden mental ray 3.10 features without using these scripts, expose here using the string options.
select miDefaultOptions;
I prefer just using this set of scripts to reveal the MR features and reportedly Maya 2014 put most of these menues into the new Maya in almost the same way.

Great info from elementalray blog on Unified Sampling
For the layman, unified sampling is a new sampling pattern for mental ray which is much smarter than the older Anti-Aliasing (AA) sampling grid.  Unified is smarter because it will only take samples when and where it needs to.  This means less wasted sampling (especially with things like motion blur), faster render times, and an improved ability resolve fine details.

Technically speaking, unified is Quasi-Monte Carlo (QMC) sampling across both image space and time.  Sampling is stratified based on QMC patterns and internal error estimations (not just color contrast) that are calculated between both individual samples and pixels as a whole.  This allows unified to find and adaptively sample detail on a scale smaller than a pixel.

“samples quality”
  • This is the slider to control image quality.  Increasing quality makes things look better but take longer.  Do testing at 0.2 or so, then final render at 1.0
  • It does this by adaptively increasing the sampling in regions of greater error (as determined by the internal error estimations mentioned before).
  • You can think of quality as a samples per error setting.


list of current and new features of mental ray verions, currently using 3.10.1.4

Environment Light


You can use the regular Maya procedure for adding an HDRI or a Texture to light the scene including the flags. You can also attach any environment to the camera such as an environment shader, environment switch or Sun & Sky.

1) you can increase the verbosity of the output in the Maya Rendering Menu > Render > Render Current Frame (options box)
2) Time Diagnostic Buffer - check on the “Diagnostic” box in the Render Settings.
and EXR file will write out to \projects\project_name\renderData\mentalray\diagnostic.exr

To get an animated sequence of HDR images into your IBL node (mapping angular), switch type from file to texture, then input a standard Maya texture that can import a sequence.